Table of Contents
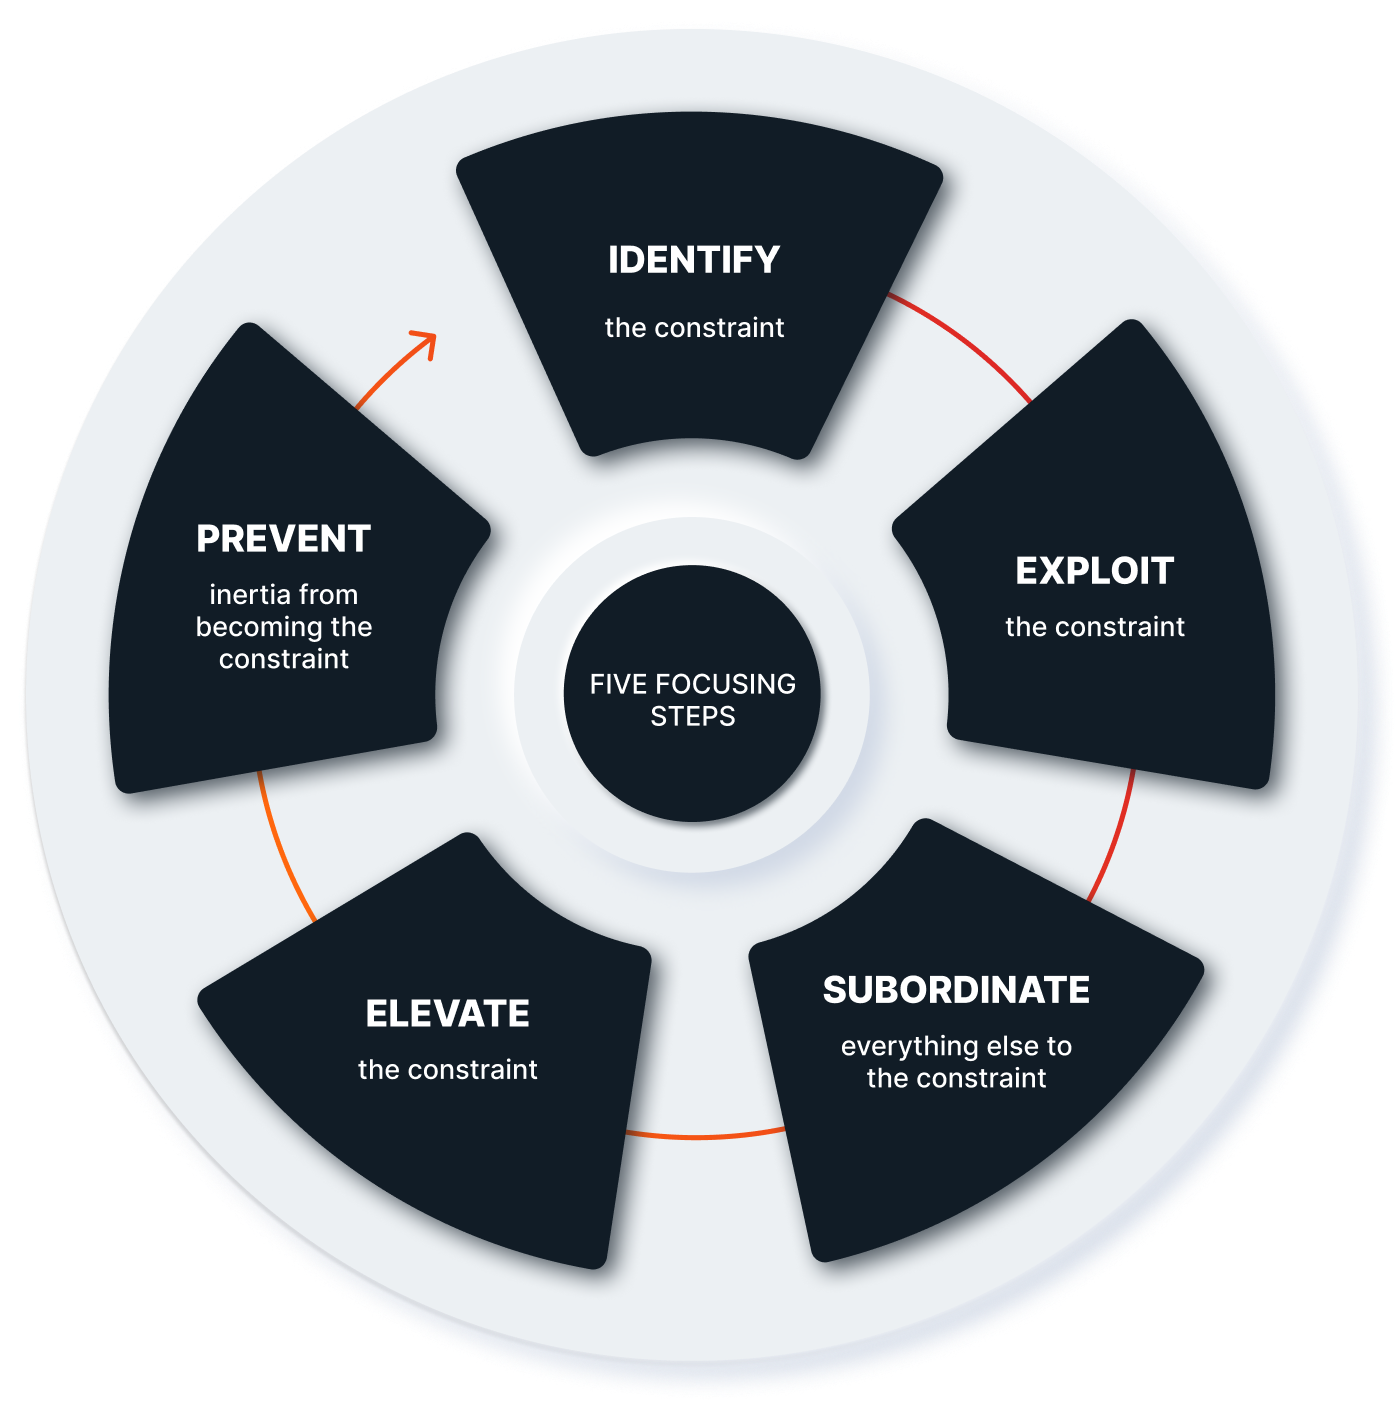
The Five Focusing Steps were introduced in the Theory of Constraints (TOC) as a way to continually improve a system. Also known as the Process of On-Going Improvement (POOGI), the Five Focusing Steps is a powerful tool for making any team or system more productive.
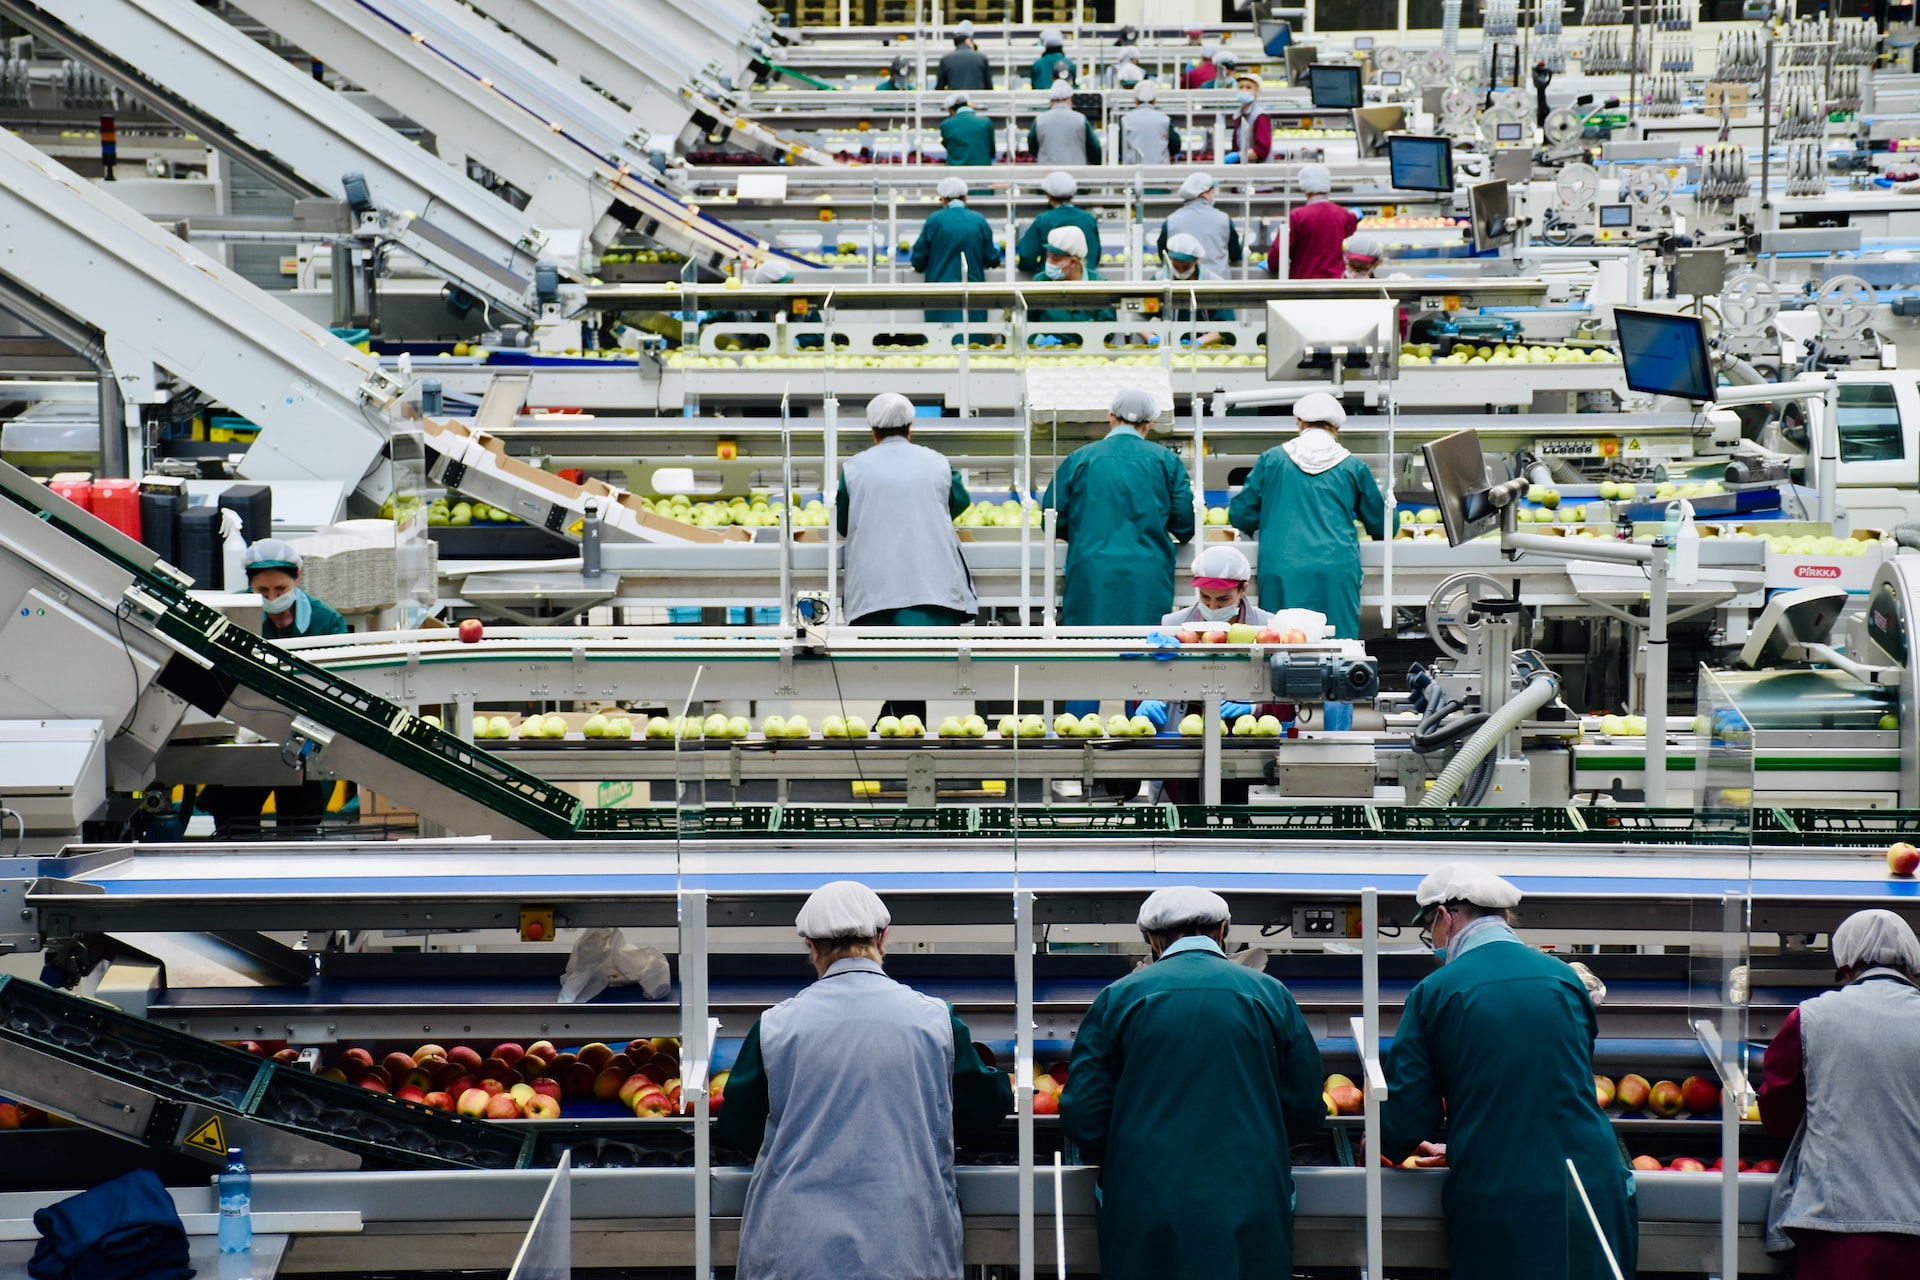
The Theory of Constraints and the Five Focusing Steps were first described in Eli M. Goldratt’s book The Goal. In The Goal, Goldratt tells the story of Alex Rogo, a plant manager who is struggling to keep his factory running. Alex is introduced to the Theory of Constraints and the Five Focusing Steps by his mentor and learns how to use them to improve his factory.
While the book focuses on a factory, the Five Focusing Steps can be applied to any system. At Twin Sun, we use the Five Focusing Steps to improve developer productivity and help our clients reach their goals. While our environment is very different from a factory floor, the Theory of Constraints works just as well for us as it does for Alex in The Goal.
Using examples from our everyday work, this article will show you how to use the Five Focusing Steps to improve your business.
Step 1: Identify the Constraint
The first step in the Five Focusing Steps is to identify the constraint. The constraint is whatever part of the system is limiting our ability to reach our goal. Since the constraint is the slowest part of the system, it stands to reason that there is always a constraint. Given the right tools and enough resources, we can always improve any system.
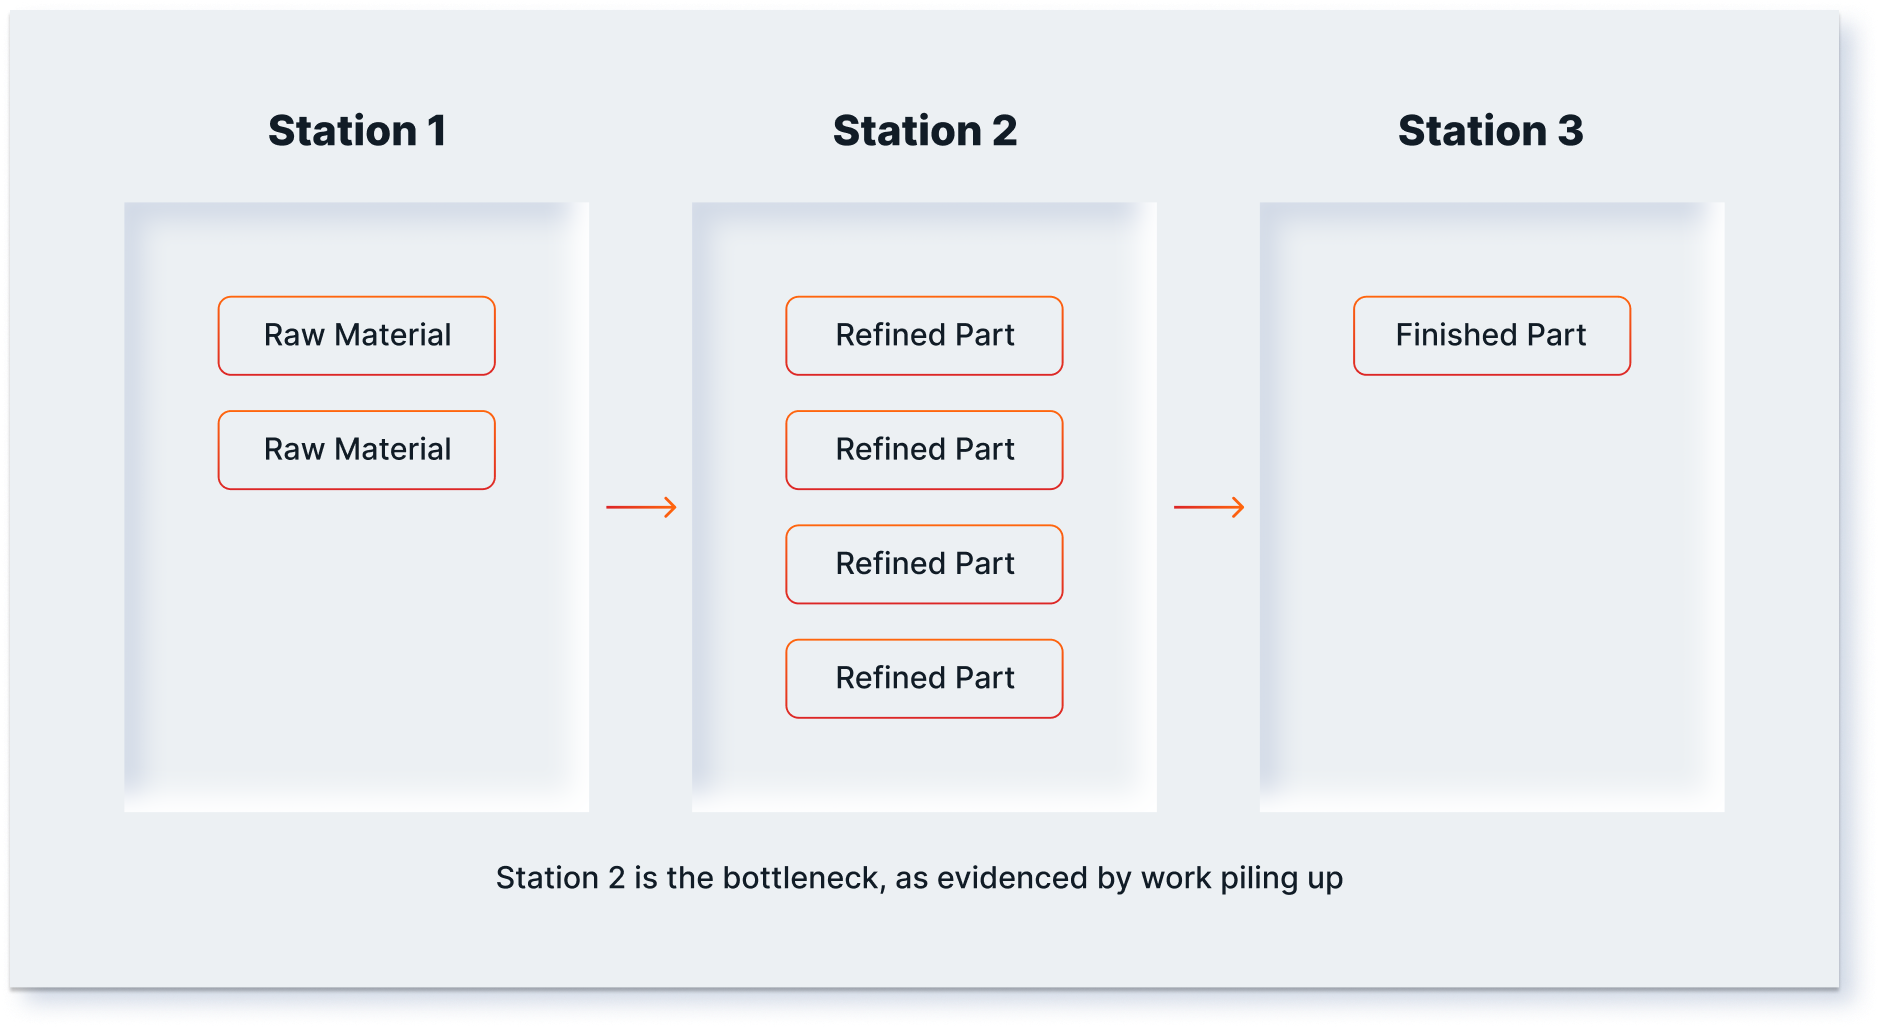
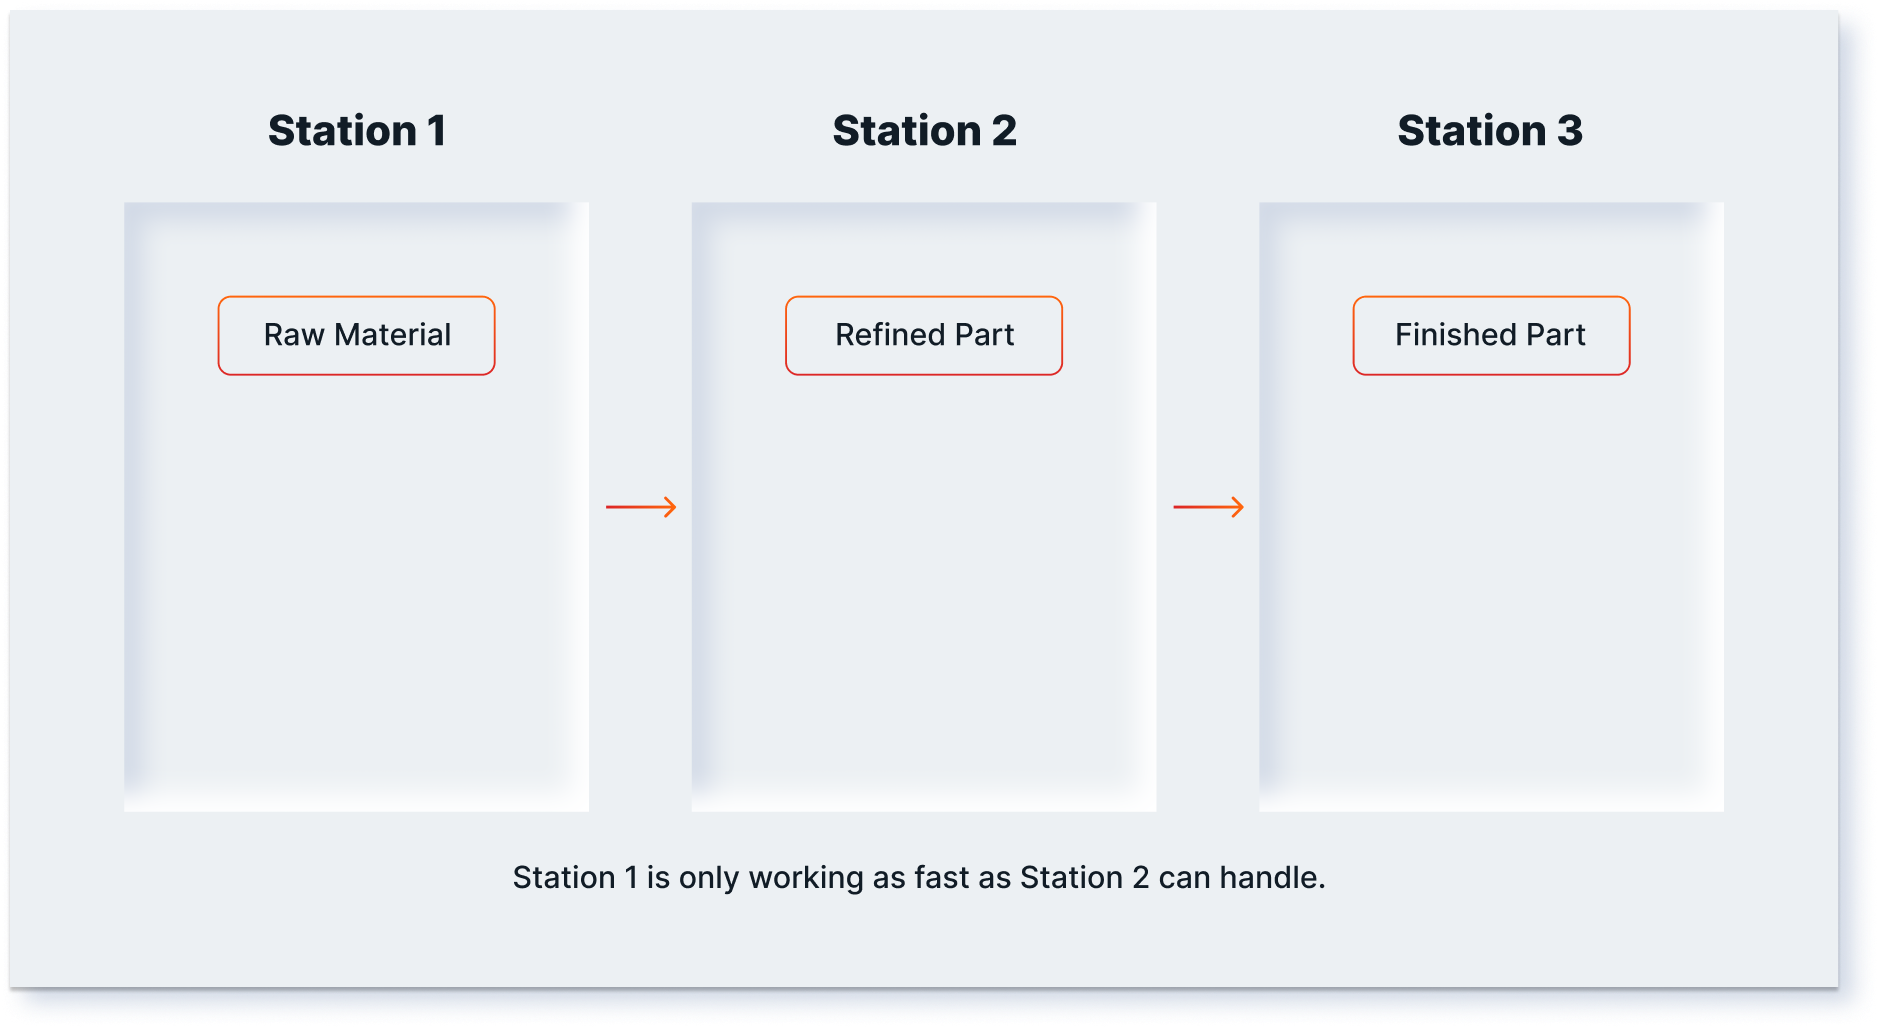
You can think of the constraint as the weakest link in a chain. In a factory, the constraint is usually a bottleneck in the production line. For example, if you have 3 stations along an assembly line, and work from Station 1 is piling up at Station 2, then Station 2 is your constraint.
In software development, we have an analog to the assembly line: the kanban board. Kanban boards visualize the work that needs to be done and the work that is in progress.
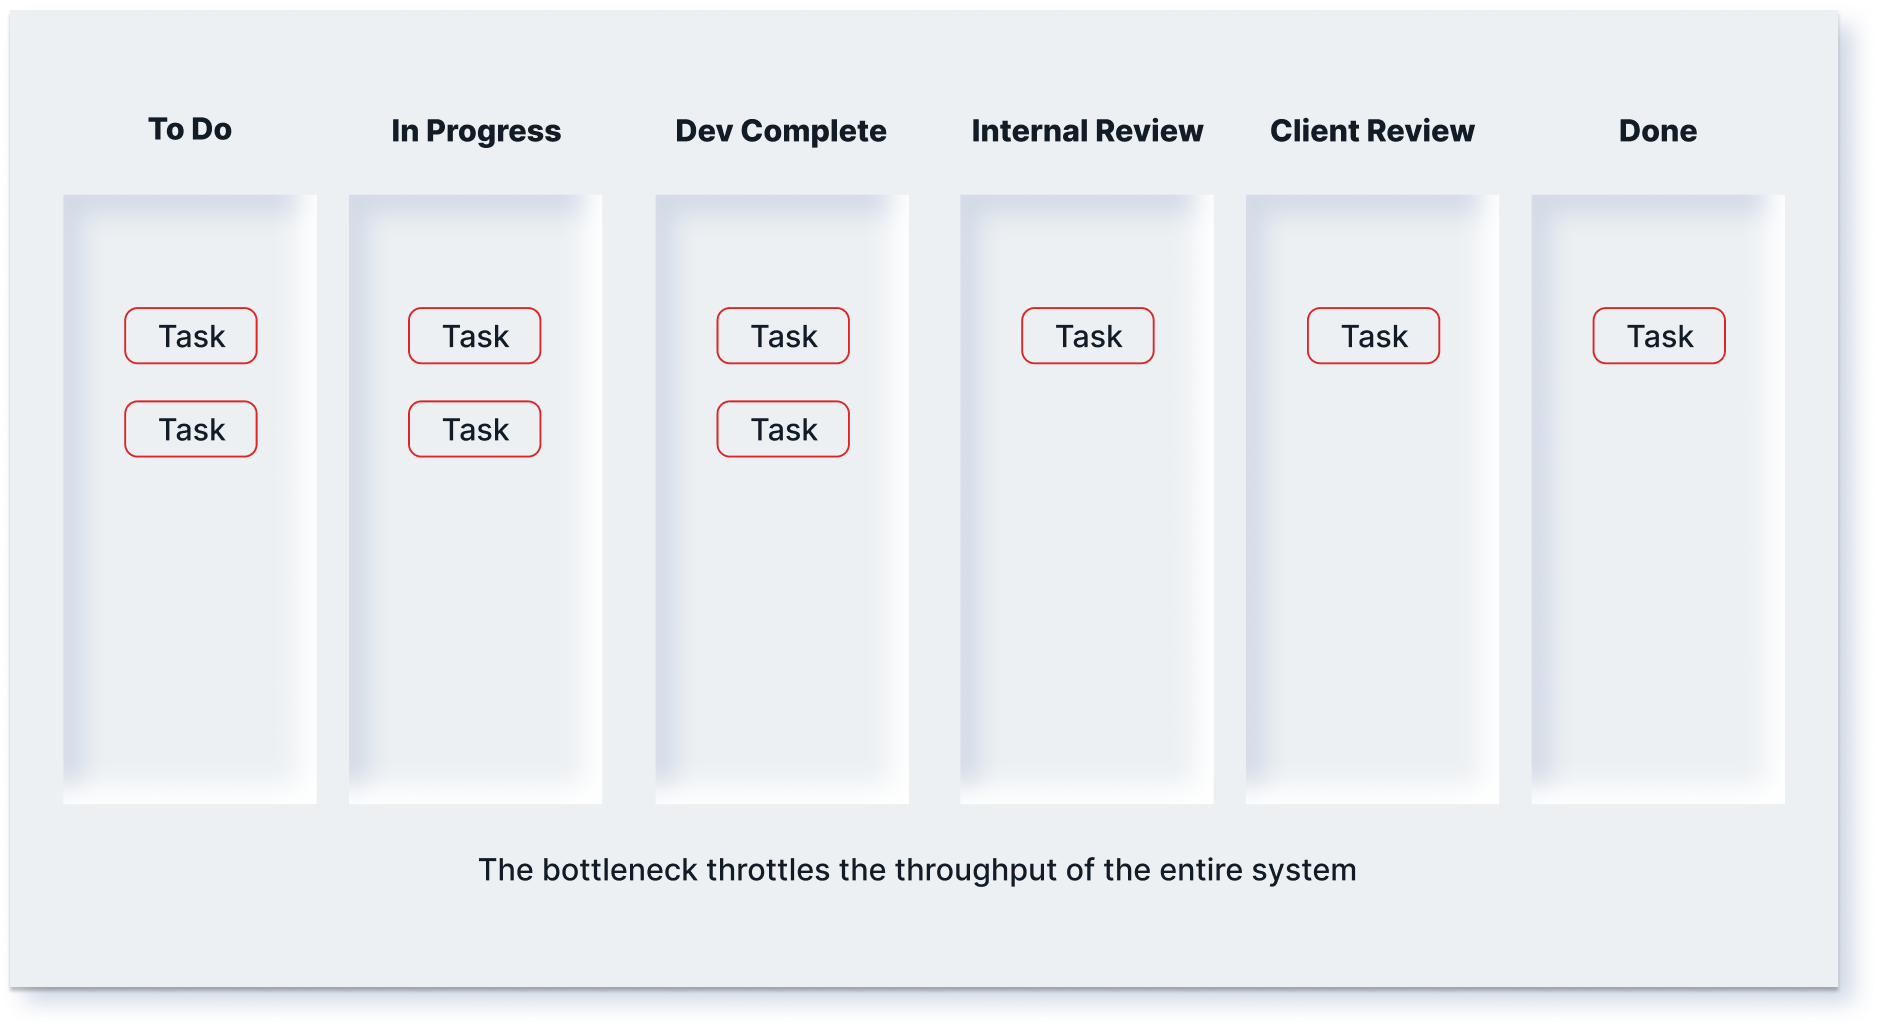
Below is an example of our standard kanban board with a real constraint we encountered on a recent project. It has the following workflow states (columns), with work moving from left to right (from “To Do” to “Done”):
- To Do: Work that has not yet started.
- In Progress: Work being performed by a developer.
- Dev Complete: Work awaiting code review or deployment.
- Internal Review: Work awaiting review by a team member.
- Client Review: Work awaiting review by our client.
- Done: Work that has been accepted by our client.
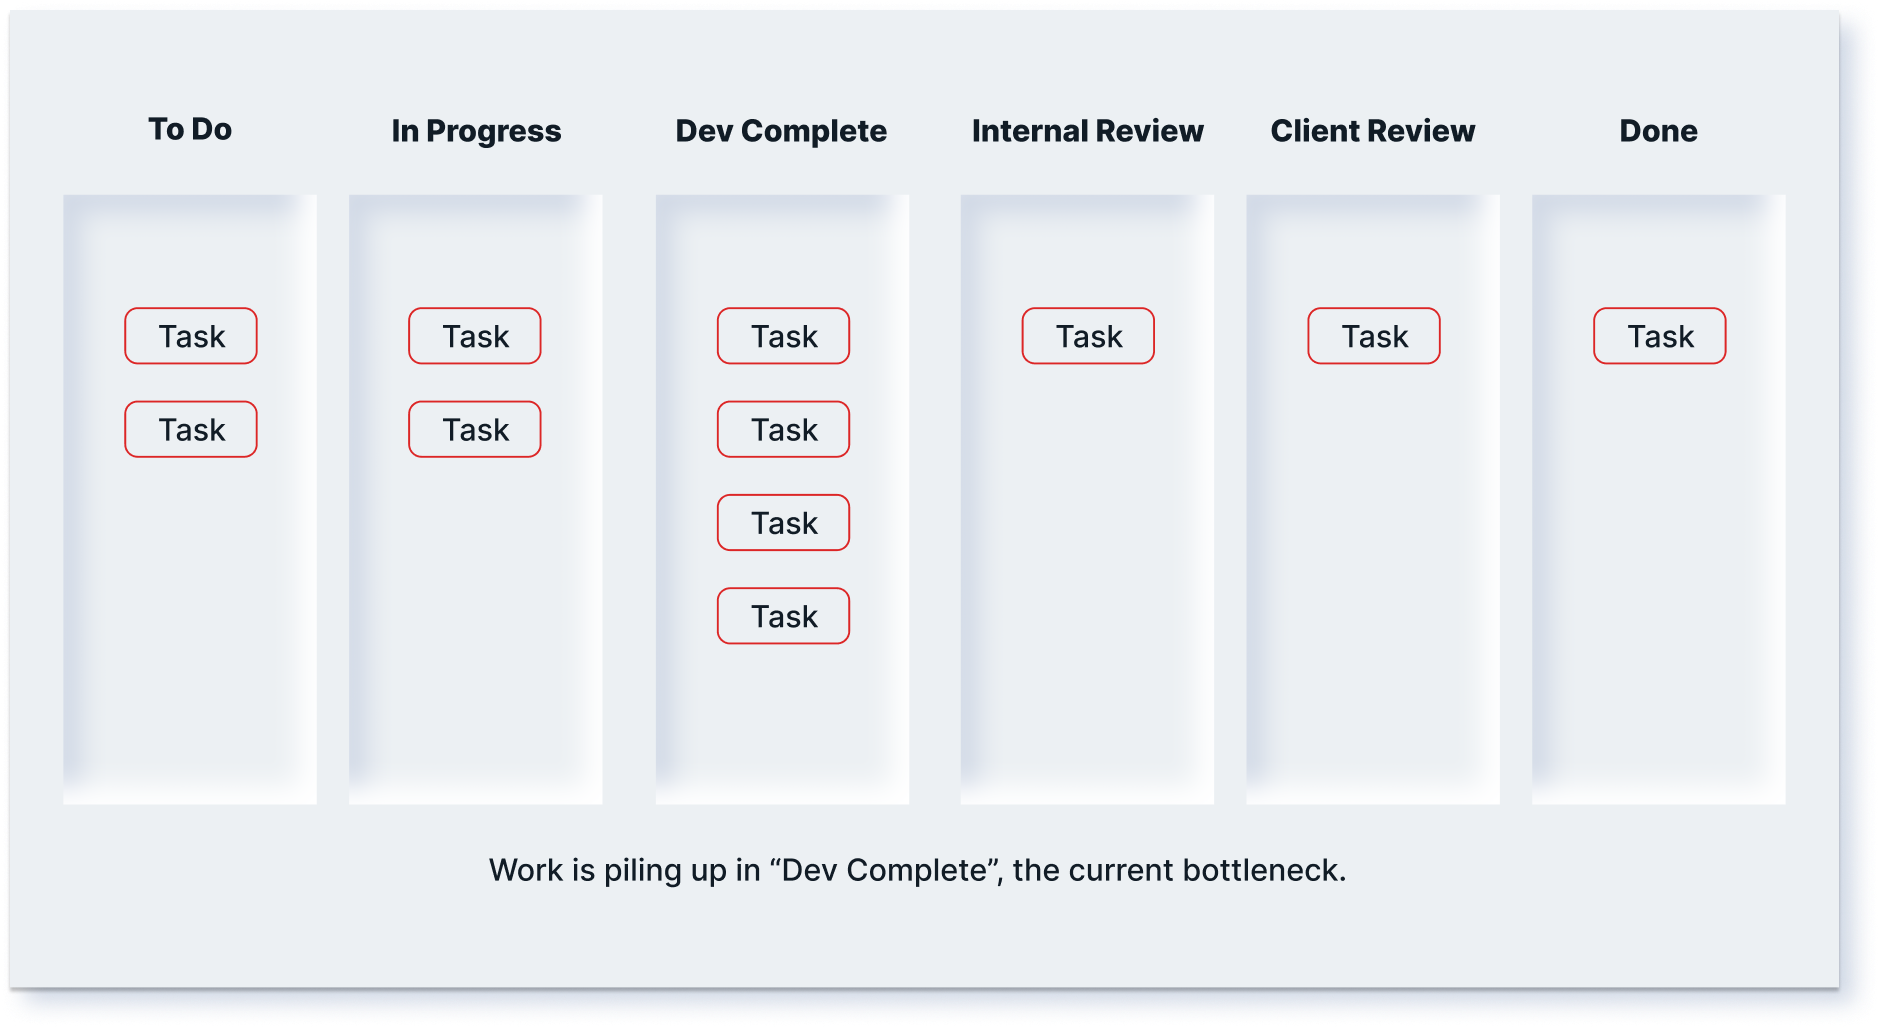
How do we identify the bottleneck on a kanban board? The bottleneck is the column with the most work in it. In this case, the bottleneck is the Dev Complete column.
We investigated why work was piling up in Dev Complete. Our developers cited two issues. First, they were waiting for someone to review their code changes in a merge request. We require merge requests (a code review) as part of our development process. Second, developers were waiting a long time on automated deployments to a staging environment.
Both of those issues prevented the developer from moving their tasks from Dev Complete to Internal Review.
Are All Constraints Internal?
Some problems may be outside of your control. A system may be constrained by part suppliers, delivery services, or other external resources. For example, a manufacturer may require certain parts from a vendor. If the vendor can not deliver enough parts to keep the manufacturer busy, then the vendor is the manufacturer’s bottleneck.
An external constraint may be more difficult to influence, but it is possible. The manufacturer could negotiate a better deal with the vendor or find a new vendor, for example. When identifying your constraint, keep in mind that some bottlenecks may be external. External bottlenecks are still worth identifying and alleviating, even if it requires coordination with a third party.
Step 2: Exploit the Constraint
Once you’ve identified your constraint, it’s time to exploit the constraint. This means that you ensure the constraint is working as hard as possible, or is “fully utilized.” In our earlier factory example, Station 2 was the bottleneck. To exploit that constraint, we would ensure that the machine at Station 2 is always working.
If the machine is not working part of the time, we need to find the reason why and fix it. For example, if the machine has to be manually loaded with parts, we’d make sure that the parts are always available and someone is monitoring the machine to load more parts as soon as they are needed.
For our software development constraint, we needed to ensure that our developers were always working. They had a noticeable amount of idle time due to the delays they experienced with work in the Dev Complete column.
To exploit the constraint, we needed to reduce the amount of time that developers spent waiting for code reviews and deployments. A naive solution is to leave “finished” work in Dev Complete and move a new task into In Progress while waiting for merge requests and deployments. However, doing so could result in a bigger pileup in Dev Complete. If work is already getting stuck in Dev Complete, we need to find a way to reduce the amount of work sitting in that column. Picking up a new task would just exacerbate our problem (as we’ll discuss in the next step).
Instead, we should seek to reduce the idle time for tasks in Dev Complete. First, we can reduce the time developers must wait for their merge requests to be reviewed. Our typical process is to notify the entire team and have the first available developer review the merge request. However, developers may not generally prioritize a merge request from another developer over completing their own work. To address this, we made a slight change to our merge request process. The existing procedure will stay in place, but the developer will also individually notify their team’s lead developer. This will raise awareness with a specific person who can prioritize reviewing the merge request.
Second, we can reduce the time developers must wait for deployments. We have a staging environment that is automatically deployed when a merge request is merged to the main code branch. However, this particular deployment was taking a long time: nearly 30 minutes. In an ideal world, deployment would take ten minutes or less. We recognized that we could change which build runners handle this project’s deployments to reduce the time it takes to deploy to staging. Deployments from the new build runner take about 8 minutes.
Determining the Constraint’s Utilization
Ideally, your constraint is 100% utilized. The constraint should never be idle because your entire system can only work as quickly as the constraint works. Time is a simple way to measure utilization. Is the resource working or not?
Let’s take a look at our developers. They work eight hours each day. (Don’t worry, we’re not going to make them work 24-hour days!)
Prior to us making any changes, developers might wait on 3-4 deployments per day. With a 30-minute deployment time, that’s two hours of idle time. Assuming all other time is fully utilized, that gives us a 75% utilization for our constraint.
After we reduced build times to 8 minutes, our two hours of idle time was lowered to a mere 32 minutes. That brings us to over 93% utilization for our constraint.
Step 3: Subordinate Everything to the Constraint
Once you’ve exploited the constraint, you need to subordinate everything to the constraint. That means ensuring that non-constraints do not work faster than the constraint. In our factory example, if Station 2 is the bottleneck, we need to ensure that Station 1 does not work faster than Station 2. If Station 1 is working faster than Station 2, the work-in-process (WIP) will pile up at Station 2. Station 2 will have more work than it can handle, which will once again cause the entire system to slow down.
Subordinating also means ensuring that the rest of the system supports the constraint. That is, if something is needed by the bottleneck, the system provides it so the bottleneck remains productive.
In software development, we subordinated to our developers by ensuring that they always had a reasonable buffer of work to do. The project’s lead developer would always have a few tasks prepared in the To Do column, ensuring the team had enough work in front of them to remain fully utilized.
Additionally, we ensured that internal reviewers were prepared to handle the work being completed by the developers. Even though “Internal Review” comes after our bottleneck, we must not let WIP pile up in Internal Review, either. If work did pile up in Internal Review, that would be our new bottleneck, and we would need to move our attention to fixing that problem. Our developers may even be required to slow down if that were to happen. We would then, once again, have a resource utilization problem, and likely watch our bottleneck move back to development. Thrashing back and forth because we failed to subordinate everything to the constraint would create confusion within our team about where to focus, and would ultimately lower our throughput. While there will always be a constraint, this subordination step should avoid creating a new one.
Once we have subordinated everything to the constraint, our bottleneck will start looking a bit better.
Step 4: Elevate the Constraint
At this point, our bottleneck is working as well as it can within the system. Throughput is theoretically as high as it can be without adding more resources to the system. That’s exactly what step 4 is all about: adding more resources to the system.
You elevate the constraint by adding more equipment, people, or other resources to the system at the bottleneck. Continuing the assembly line example, we could add another machine at Station 2 to increase throughput. Theoretically, a second machine should double the throughput of Station 2.
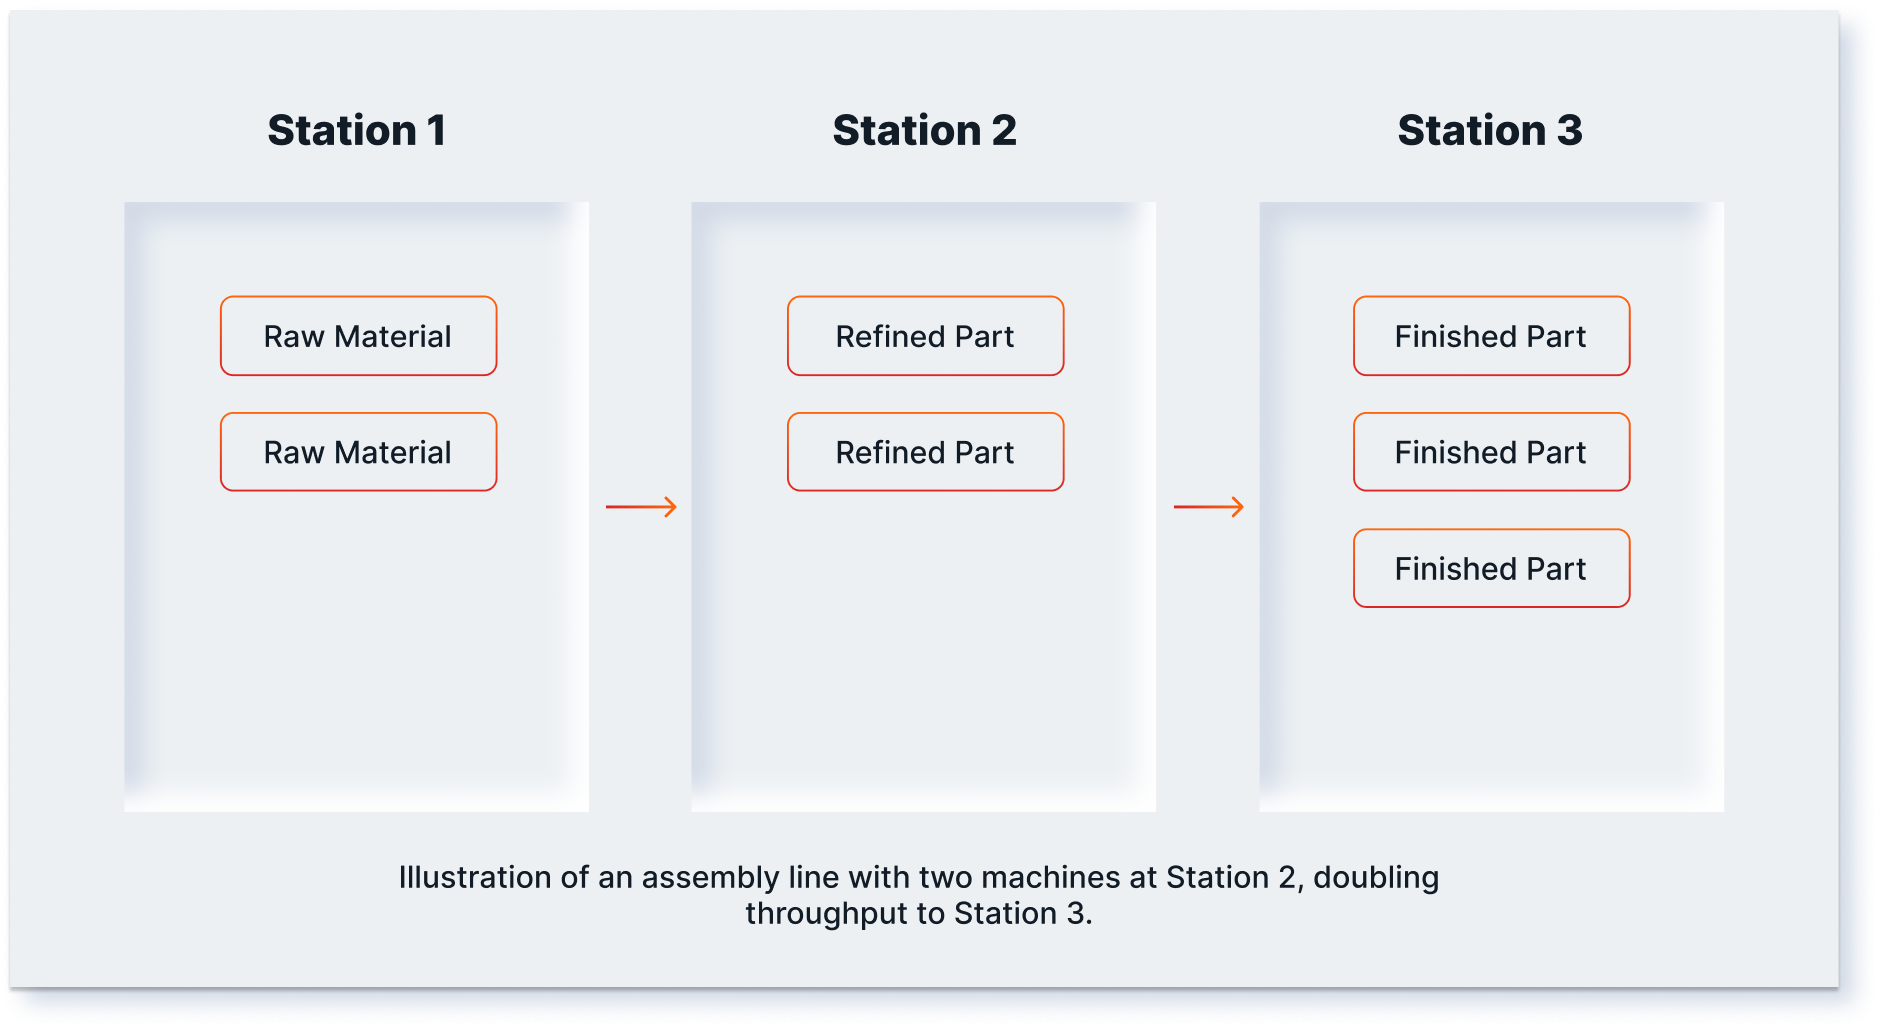
(Notice that the constraint has moved! More on that in a moment.)
In software development, we can add more developers to the team. Now, there are some caveats to that specific idea. Unlike adding a machine to an assembly line, you will not see a linear increase in throughput. Teamwork is complex, and its complexity grows as the team grows. However, once the new team has normalized, is communicating well, and is coordinating work effectively, a larger team can increase throughput.
Let’s imagine for a moment that the build runners themselves were our bottleneck. If that were the case, we could add more build runners to linearly increase throughput, just like you’d expect by adding machines to an assembly line.
Step 5: Prevent Inertia From Becoming the Constraint
At this point, your constraint has been alleviated. Congratulations! With your bottleneck alleviated, your system’s throughput is higher than it was when you started. That means more money for your business and happier customers.
However, as we stated earlier, there is always a constraint. As soon as you alleviate one constraint, another one will appear. This is the nature of constraints: something in the system is always the slowest thing. There is always a bottleneck.
That’s why Step Five of the Five Focusing Steps is to prevent inertia from becoming the constraint. Inertia is the tendency of a system to resist change. Now that your constraint has moved, the work you have done to alleviate the previous constraint will not fix the new constraint. That means it’s time to identify the new constraint and further improve your system. Go back to Step One and see what you can find!
Does the Process of On-Going Improvement Ever End?
So long as you wish to continue improving the performance of your system, the process of on-going improvement never ends. You can use the Five Focusing Steps as often as you like to continue identifying and alleviating constraints.
Practically, you may decide that some level of throughput is good enough. You may decide that you have reached a point where the cost of adding more resources to the system outweighs the benefits of doing so. However, should you choose, you can always increase throughput by re-applying the Five Focusing Steps.